Part 21 - How To Compile A Program
For a complete table of contents of all the lessons please click below as it will give you a brief of each lesson in addition to the topics it will cover. https://github.com/mytechnotalent/Reverse-Engineering-Tutorial
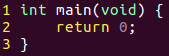
Let’s look again at last weeks C program and take a deeper look at how we turn that source code into an executable file.
To compile this program in C, we simply type:

This single step will create exit.o which is the binary object file and exit which is the binary executable file.
If we wanted to convert this C source code to Assembly, we need to use the GNU compiler in the below fashion. Lets start by running the below command in the terminal:

Let’s begin with the -S switch. The -S switch will create comparable AT&T Syntax Assembly source code. The -m32 will create a 32-bit executable and the -O0 will tell the compiler how much optimization to use when compiling the binary. That is the capital O and the numeric 0. Numeric 0 in that case means no optimization which means it is at the most human readable instruction set. If you were to substitute a 1, 2 or 3 the amount of optimization increases as the values go up.
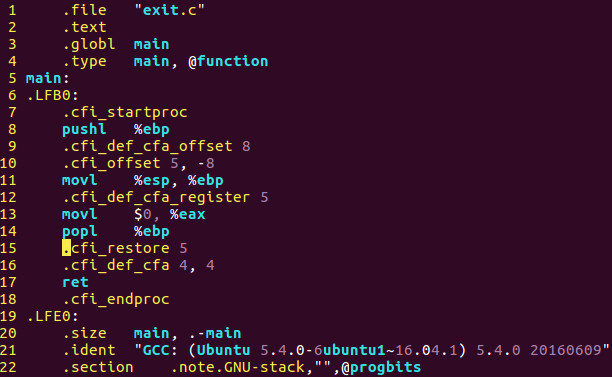
This step above creates exit.s which is the equivalent Assembly Language source code as we mentioned above.
We then need to compile the Assembly source code into a binary object file which will generate a exit.o file.

Finally we need to use a linker to create the actual binary executable code from the binary object file which will create an executable called exit.

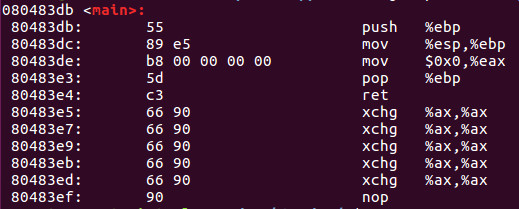
Last week when we examined the executable file exit in a program called objdump, and examined the main area we saw the following below except this time we will use AT&T Assembly Language Syntax:

This command above will create the following output below:
Lets examine the code in the debugger. Let’s start GDB which is the GNU debugger and first list the source code by typing l, then set a breakpoint on main and run the program. Finally we will disassemble and review the output below:
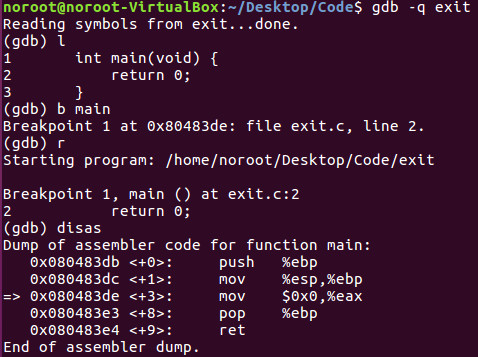
In each of the three above examinations, you will essentially see the same set of instructions which we will take a deeper look as to what is exactly going on in future tutorials.
Throughout this tutorial series thus far we have been looking at Intel Syntax Assembly Language. We are going to turn our focus to AT&T Syntax as I have stated above as this is the natural syntax utilized in Linux with the GNU Assembler and GNU Debugger.
The biggest different you will see is that in AT&T Syntax, the source and destinations are reversed.
AT&T Syntax : movl %esp, %ebp [This means move esp into ebp.]
Intel Syntax : mov esp, ebp [This means move ebp into esp.]
You will also see some additional variances as AT&T uses additional variances which we will cover in a later tutorial.
If we wanted to create a pure Assembly Code program which does the same thing above we would type:
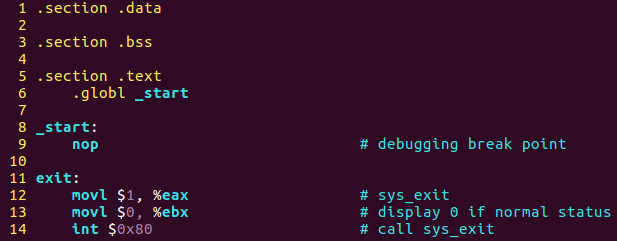
To compile this we would use the GAS Assembler and Linker:

To run any executable in Linux you type ./ and the name of the binary executable. In this case we type ./exit and press return. When we do so, nothing happens. That is good as all we did was create a program that exited to the OS.
I look forward to seeing you all next week when we dive into more assembly code!