Part 2 - Hello World
Today we are going to cover the basic setup for creating our own projects on the Raspberry Pi Pico.
Inside of our pico folder lets create a 0x02_pico_hello_world folder alongside of the pico-sdk and pico-example folders.
mkdir 0x02_pico_hello_world
cd 0x02_pico_hello_world
Let's create our vim 0x02_hello_world.c file.
vim 0x02_hello_world.c
Let's add the following.
#include <stdio.h>
#include "pico/stdlib.h"

int main()
{
  stdio_init_all();

  while(1)
  {
    printf("Hello world!\n");

    sleep_ms(1000);
  }

  return 0;
}
We first handle the logic to init all standard input and output.
stdio_init_all();
Finally we print "Hello world!" every 1 second to the standard output in an infinite loop.
    while(1)
    {
      printf("Hello world!\n");

      sleep_ms(1000);
    }
We then upon success return 0 to indicate success as our main function is an int. It is not technically required but good practice.
return 0;
Working with cmake significantly helps in the build process for our projects. We first need to make a CMakeLists.txt file.
cmake_minimum_required(VERSION 3.13)

include(pico_sdk_import.cmake)

project(test_project C CXX ASM)
set(CMAKE_C_STANDARD 11)
set(CMAKE_CXX_STANDARD 17)
pico_sdk_init()

add_executable(0x02_hello_world
  0x02_hello_world.c
)

pico_enable_stdio_usb(0x02_hello_world 1)

pico_add_extra_outputs(0x02_hello_world)

target_link_libraries(0x02_hello_world pico_stdlib)
Next we need to copy the pico_sdk_import.cmake file from the external folder in the pico-sdk installation to the 0x02_hello_world project folder.
cp ../pico-sdk/external/pico_sdk_import.cmake .
Finally we are ready to build.
mkdir build
cd build
export PICO_SDK_PATH=../../pico-sdk
cmake ..
make
This will produce a number of files and the ones we are going to focus on are the .elf file when it comes to debugging and hacking which is the full program output, possibly including debug information and the .uf2 file which is the program code and data in a UF2 form that you can drag-and-drop on to the RP2040 board when it is mounted as a USB drive.
I took the time to wire up a reset button on the Pico so that I do not have to keep unplugging in the USB and pressing the BOOTSEL every time I need to re-flash so here is the schematic of such.
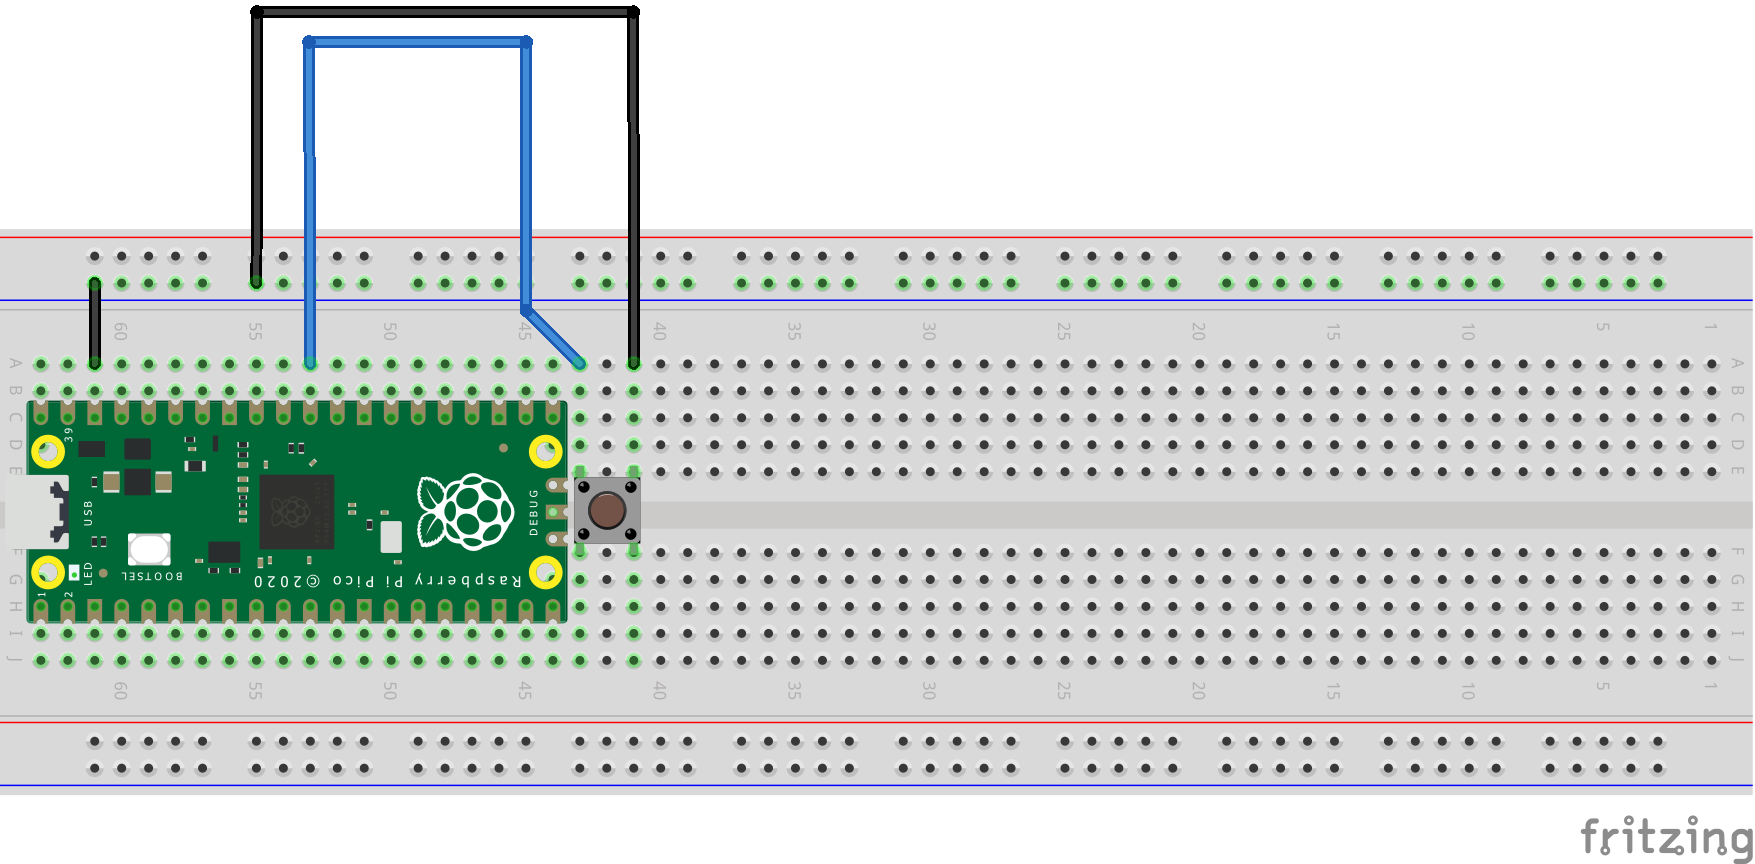
To flash press the external button and while it is still pressed, press the BOOTSEL on the board, then release the BOOTSEL and finally release the external button.
Then simply copy the .uf2 file to the drive.
cp 0x02_hello_world.uf2 /Volumes/RPI-RP2
Then we need to locate the USB drive so you can do the following.
ls /dev/tty.
Press tab to find the drive and then in my case I will use screen to connect.
screen /dev/tty.usbmodem0000000000001
Hooray! You should see, "Hello world!" to the standard output every second.
In our next lesson we will debug the .elf binary in Radare2.